Addon Dev Docs
This page is still under construction 👷🚧🛠️🔜🏗️.
Feel free to report any missing or wrong info.
Addon Purposes
Addons can be built to serve different purposes. Below is a list of purposes that were developed over time.
- Studio Addon: Studio addon houses your studio code and workflow.
- DCC Host Addon: Host addon integrates AYON into your favorite DCC. It unlocks AYON pipeline powers straight with pyblish adoption.
- Connector Addon: Connector addons connects AYON to external services.
e.g.
- Farm Manager Connector: connects AYON to farm managers like Deadline.
- Production Tracker Connector: connects AYON to external production tracker like Flow(Shotgrid) or ftrack.
- Binaries Distribution Addon: which downloads and distributes binaries to users like 3rd party addon which downloads ocio configs.
Typical Addon Repo Structure
You can find the full addon structure explained in ayon-example-addon. This guide is starting from the minimal addon example ayon-addon-template and building up.
Here's what a typical addon repo structure looks like this:
Addon Repo
  ├─ server
  │   ├─ __init__.py
  │   └─ settings.py
  ├─ client
  │   ├─ my_addon
  │   │   ├─ __init__.py
  │   │   ├─ addon.py
  │   │   └─ ...
  │   └─ pyproject.toml
  ├─ frontend
  │   └─ dist
  │       └─ index.html
  ├─ public
  │   └─ my_icon.png
  ├─ private
  │   └─ kittens.png
  ├─ services
  │
  ├─ create_package.py
  ├─ LICENSE
  ├─ package.py
  ├─ .gitignore
  └─ README.md
Addon package.py
It tells AYON important info about your addon.
- Addon Meta Data
nametitleversionclient_dirservices
- Addon compatibility with other AYON products
ayon_server_versionayon_launcher_versionayon_required_addonsayon_soft_required_addonsayon_compatible_addons
Following along this page, please note that on my side
I've cloned ayon-addon-template and changed addon name and title in package.py.
Also, let's set the version to 0.0.1.
name = "my_addon"
title = "My Addon"
version = "0.0.1"
Addon Server Code
Addon server-side part contains an implementation of BaseServerAddon class.
Implementing
BaseServerAddonis the minimum requirement for AYON Server to recognize an addon.
Minimalist addon definition
from typing import Type
from ayon_server.addons import BaseServerAddon
from ayon_server.settings import BaseSettingsModel


# Settings
class MySettings(BaseSettingsModel):
    """My Settings. """
    pass


# Default settings values
DEFAULT_VALUES = {}


class MyAddon(BaseServerAddon):
    # Set settings
    settings_model: Type[MySettings] = MySettings

    # Set default settings values
    async def get_default_settings(self):
        settings_model_cls = self.get_settings_model()
        return settings_model_cls(**DEFAULT_VALUES)
In addon server part you can:
- Define Settings
- Implement End points
- Add Web actions
Settings
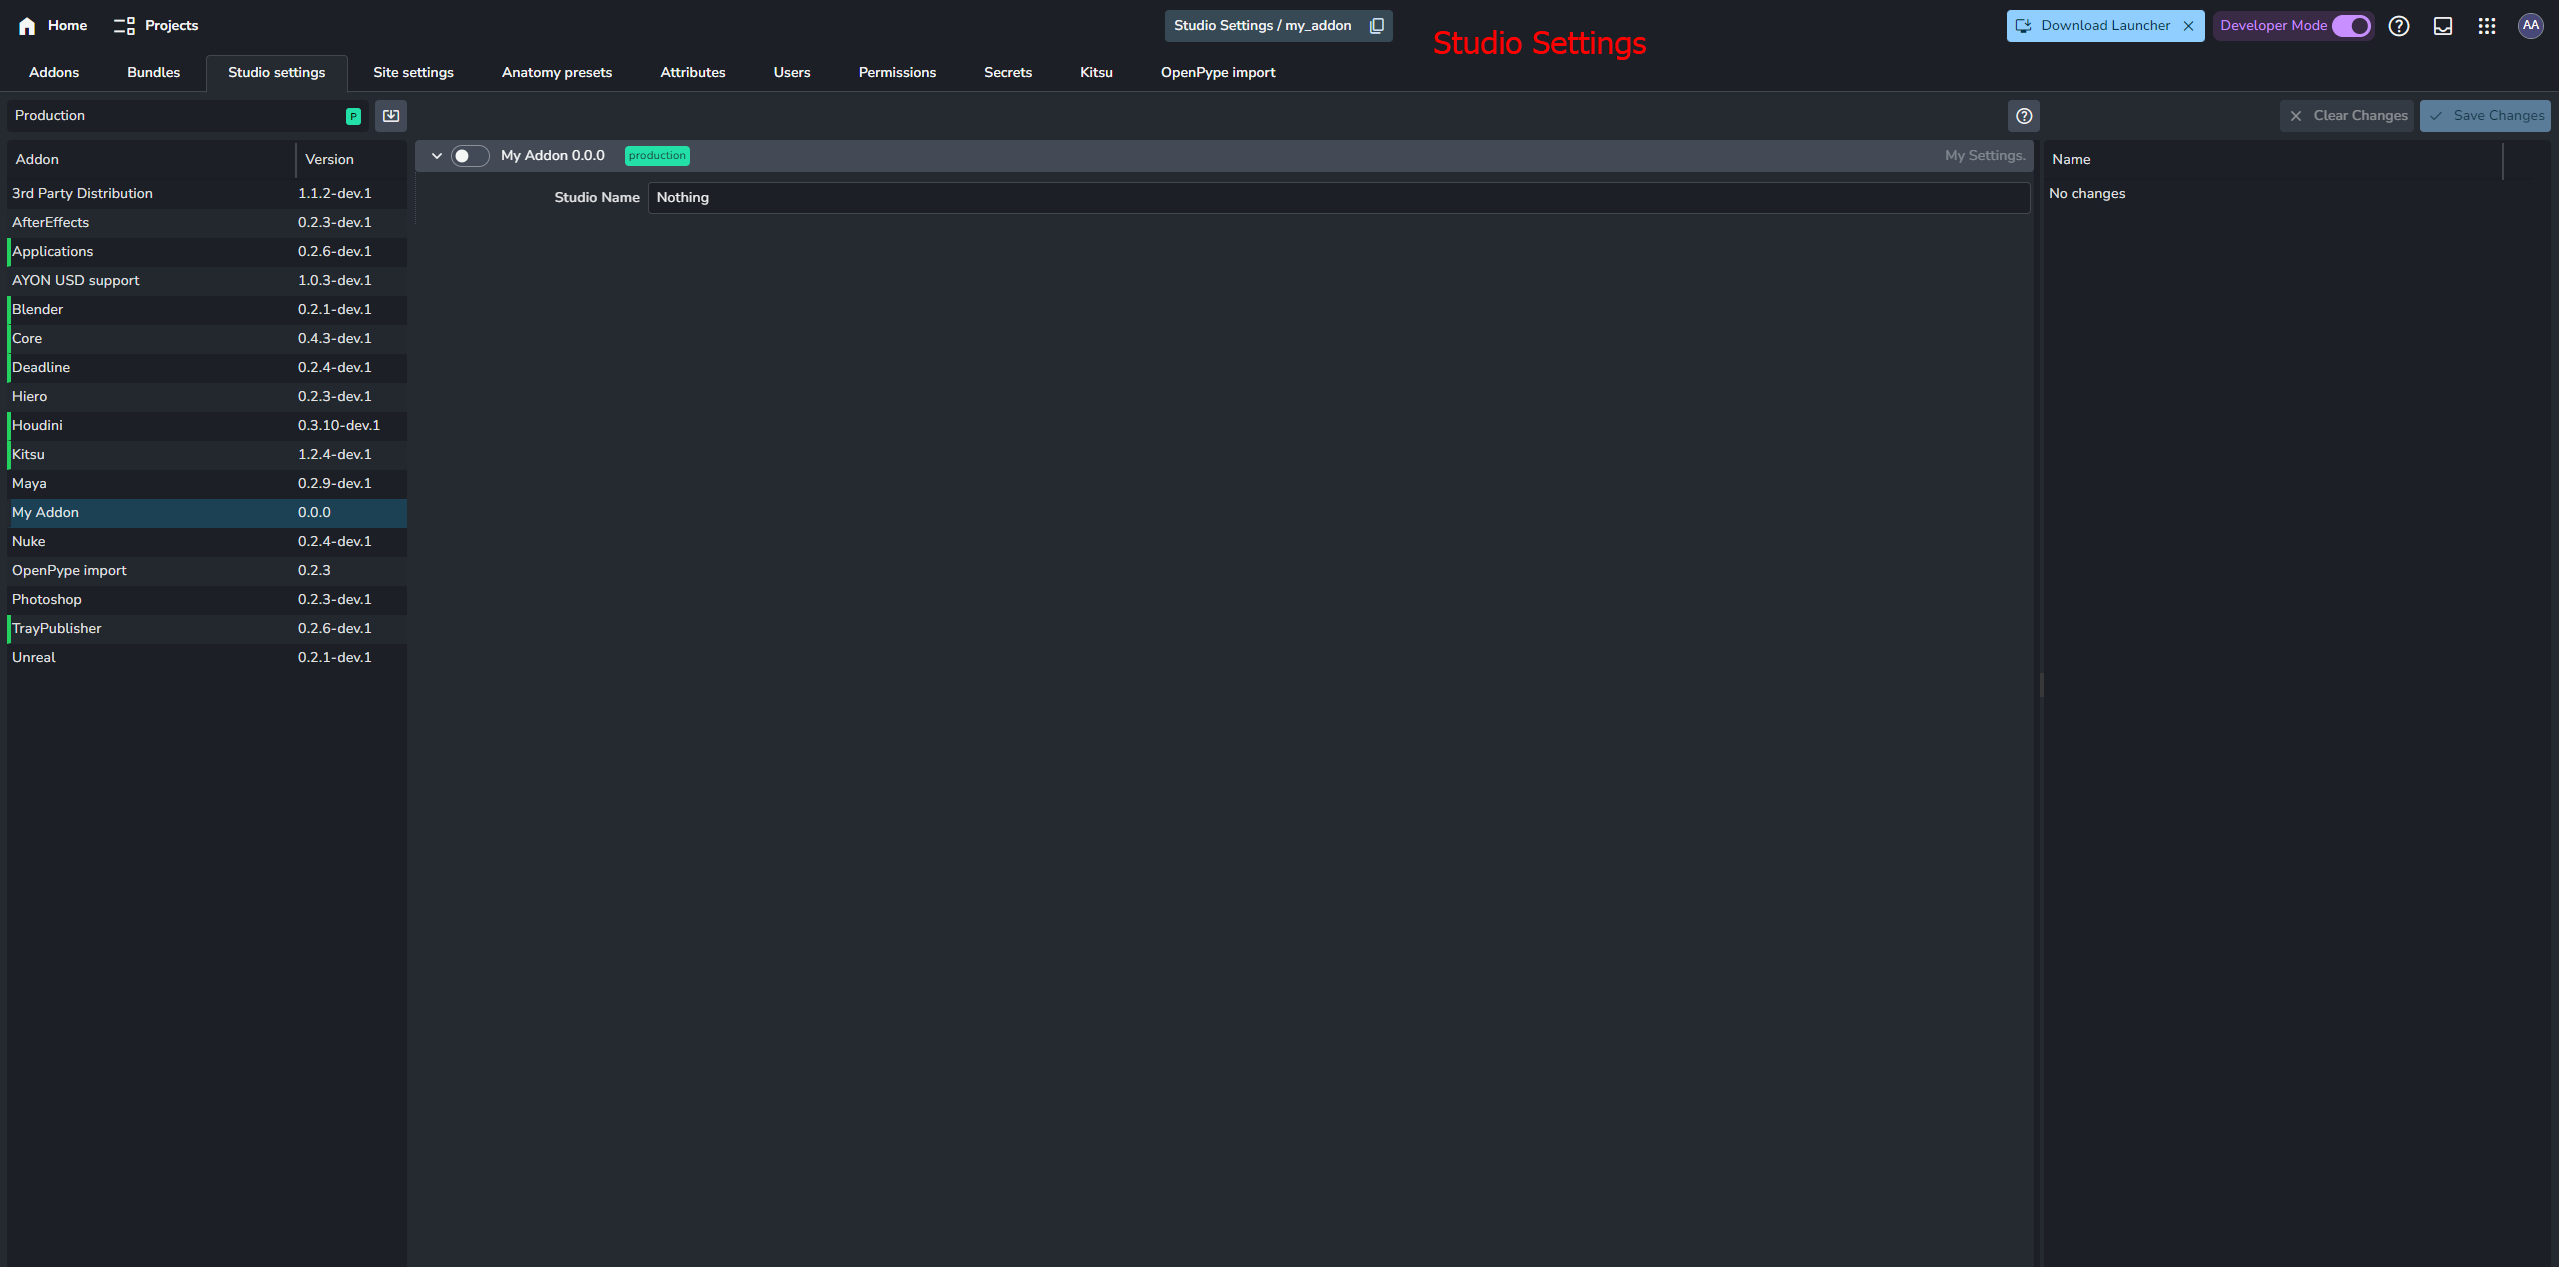
Addon settings, we have 4 scopes for settings.
- Studio settings
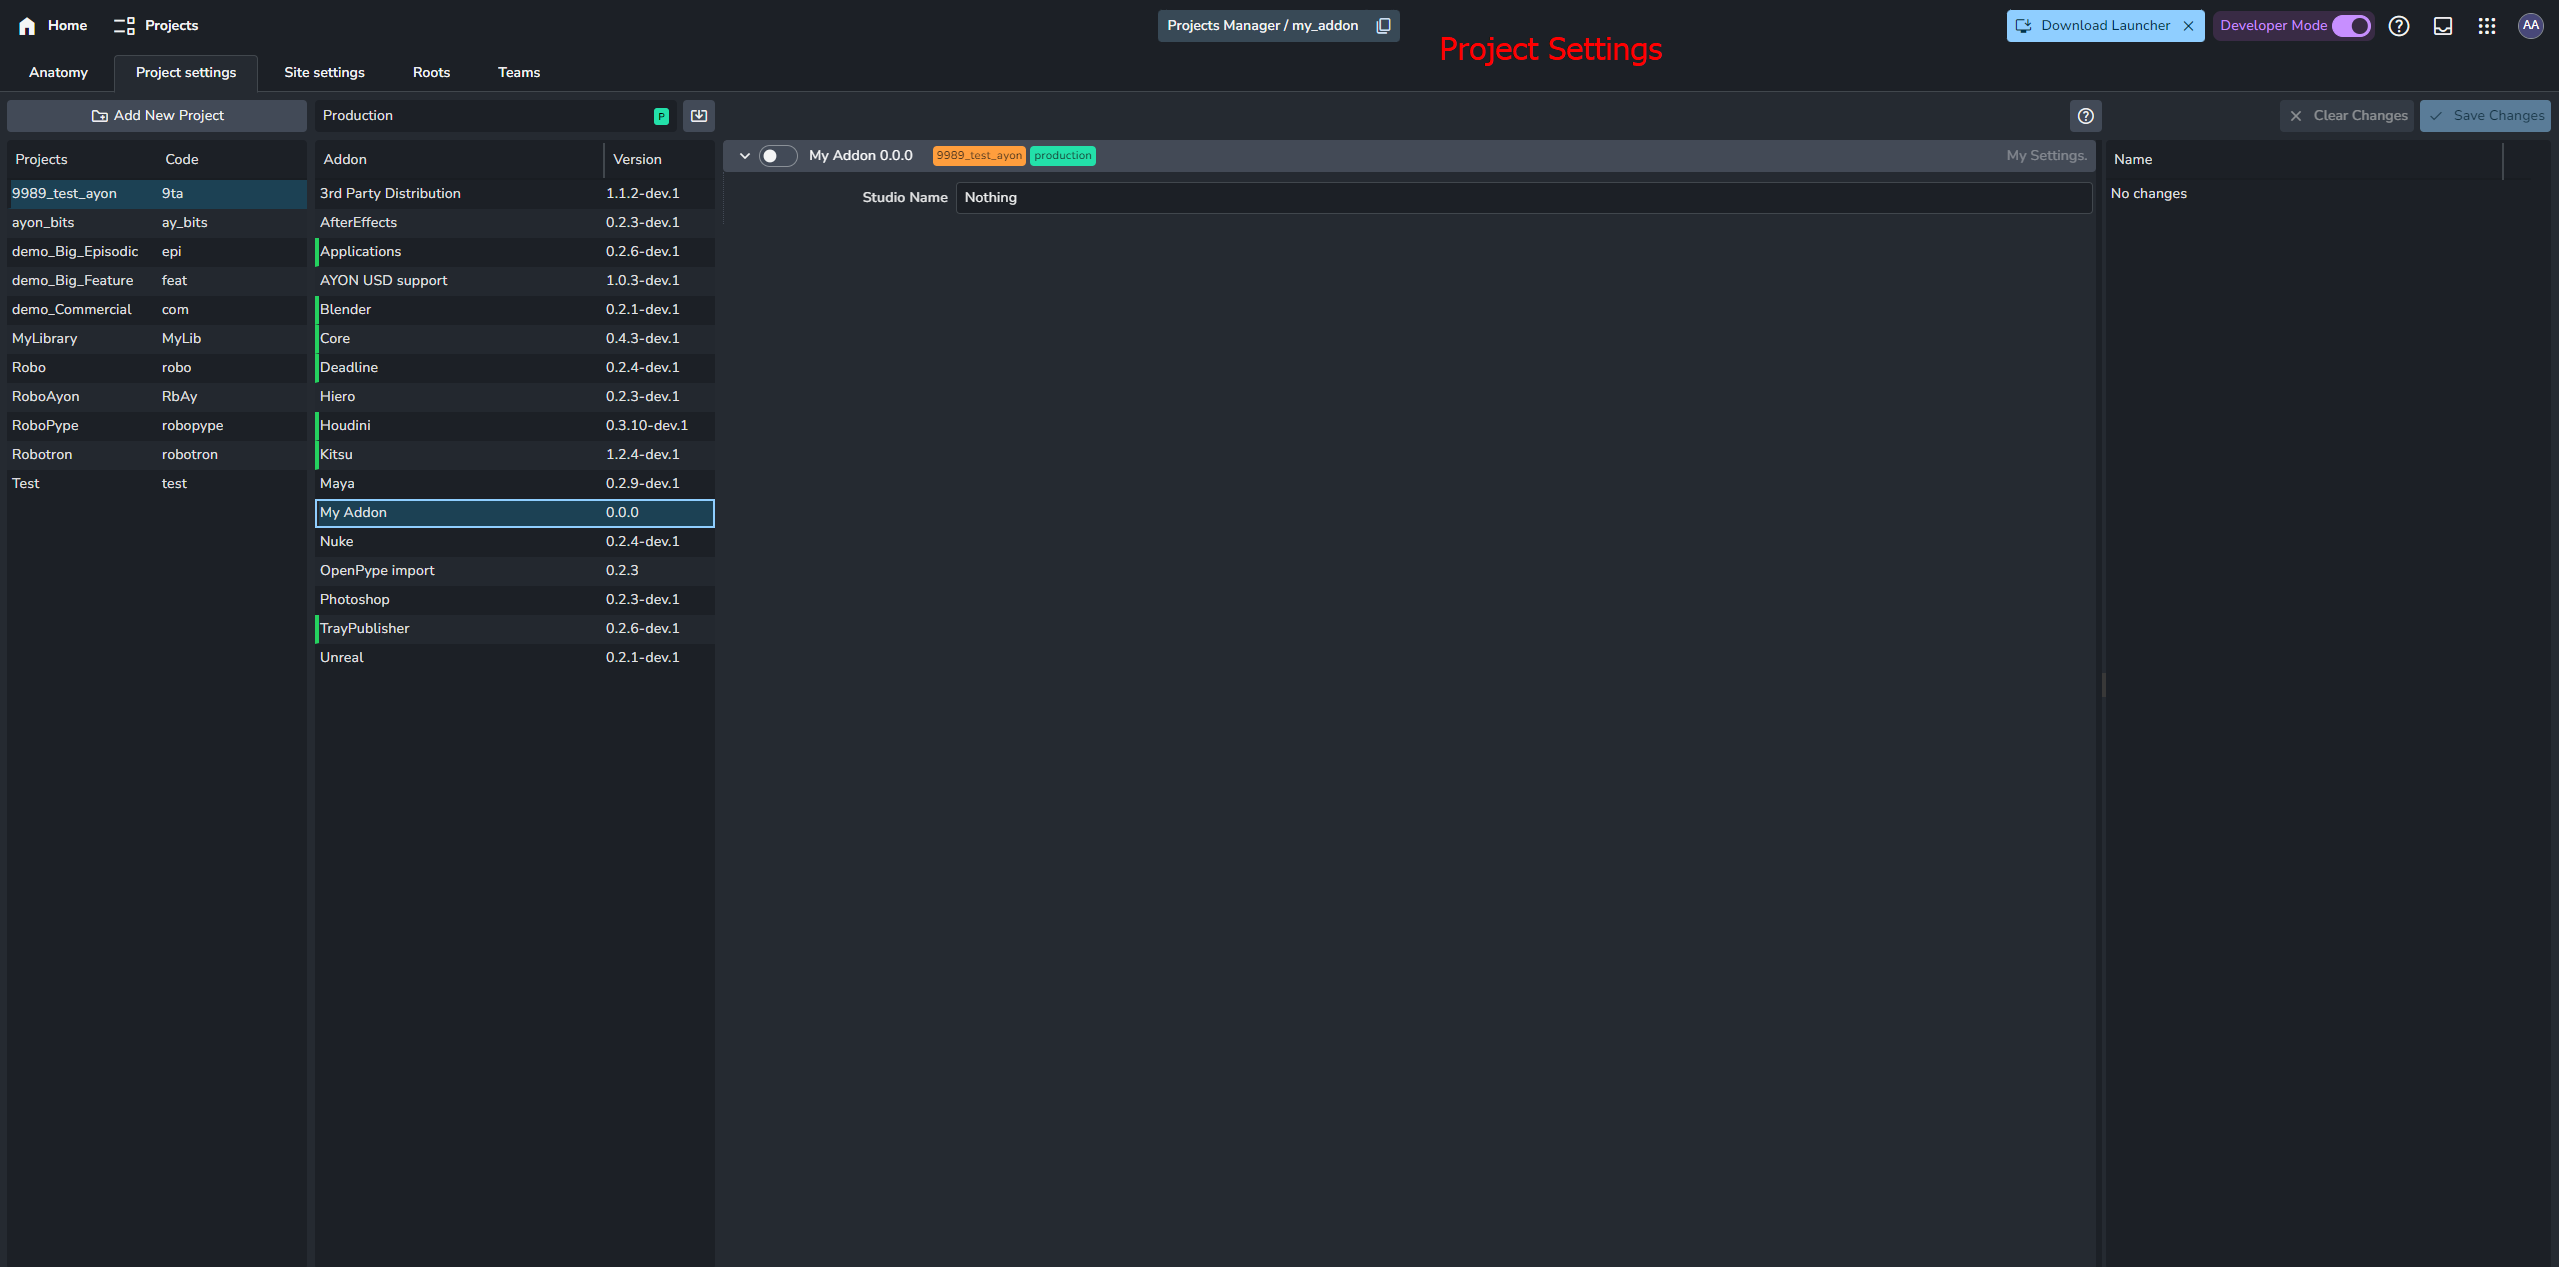
studio: Addon settings on studio level. - Project settings
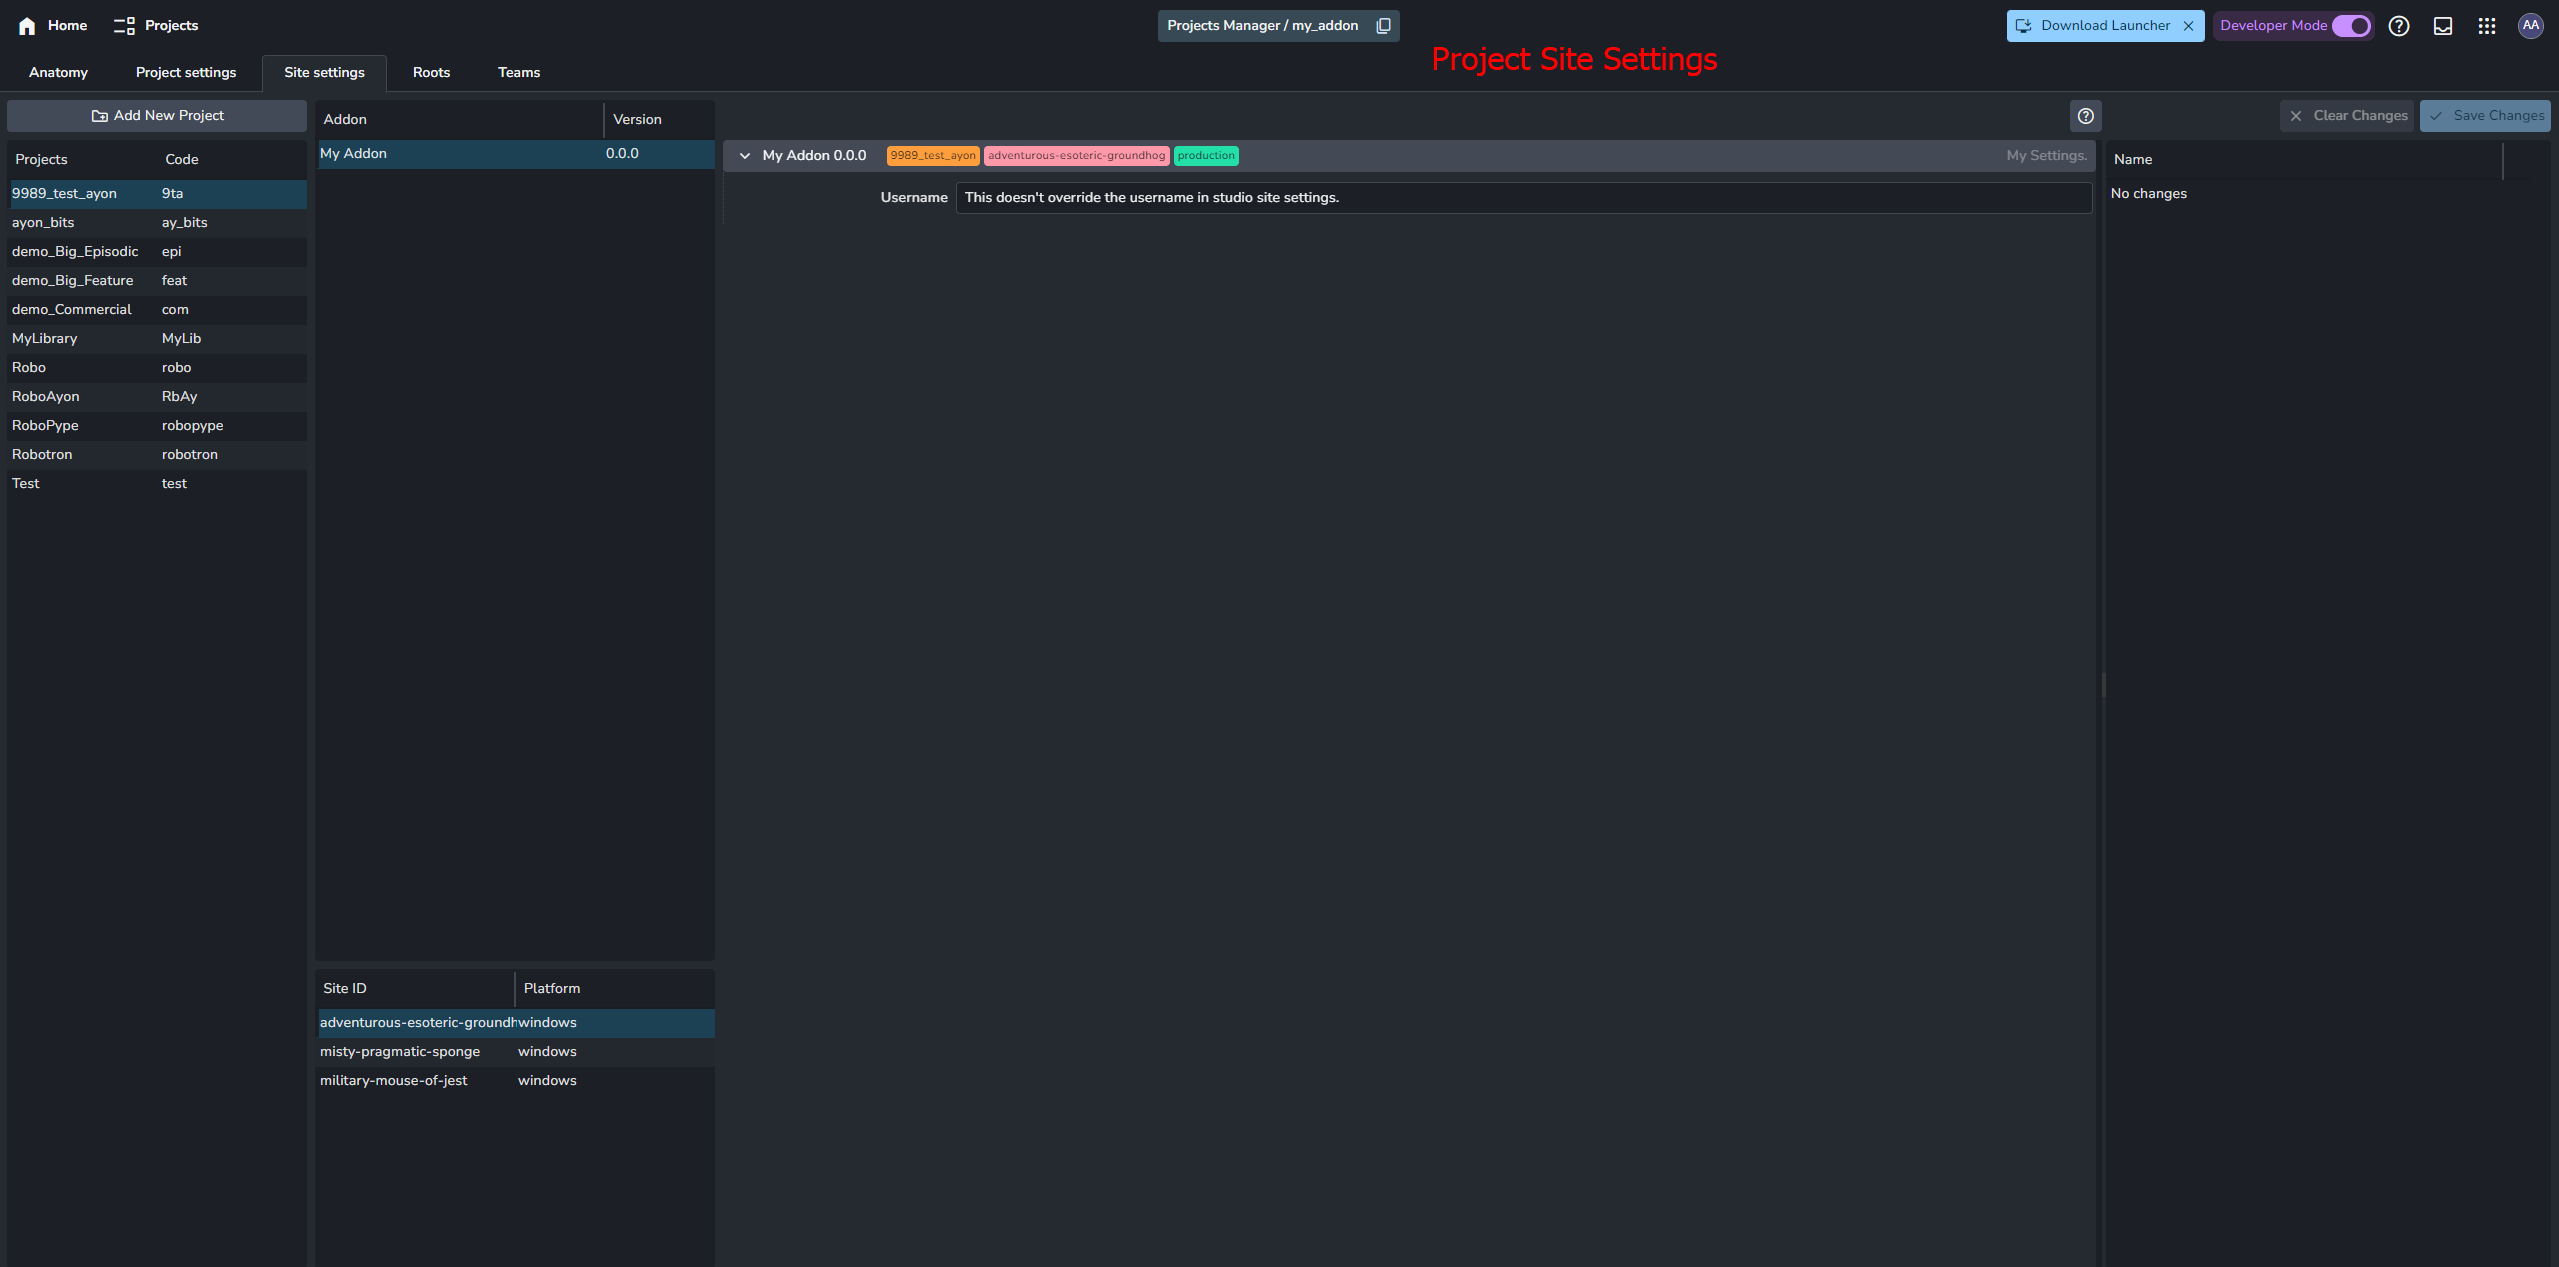
project: Addon settings on project level. They inherit studio settings and allowing overrides per project. - Project site settings
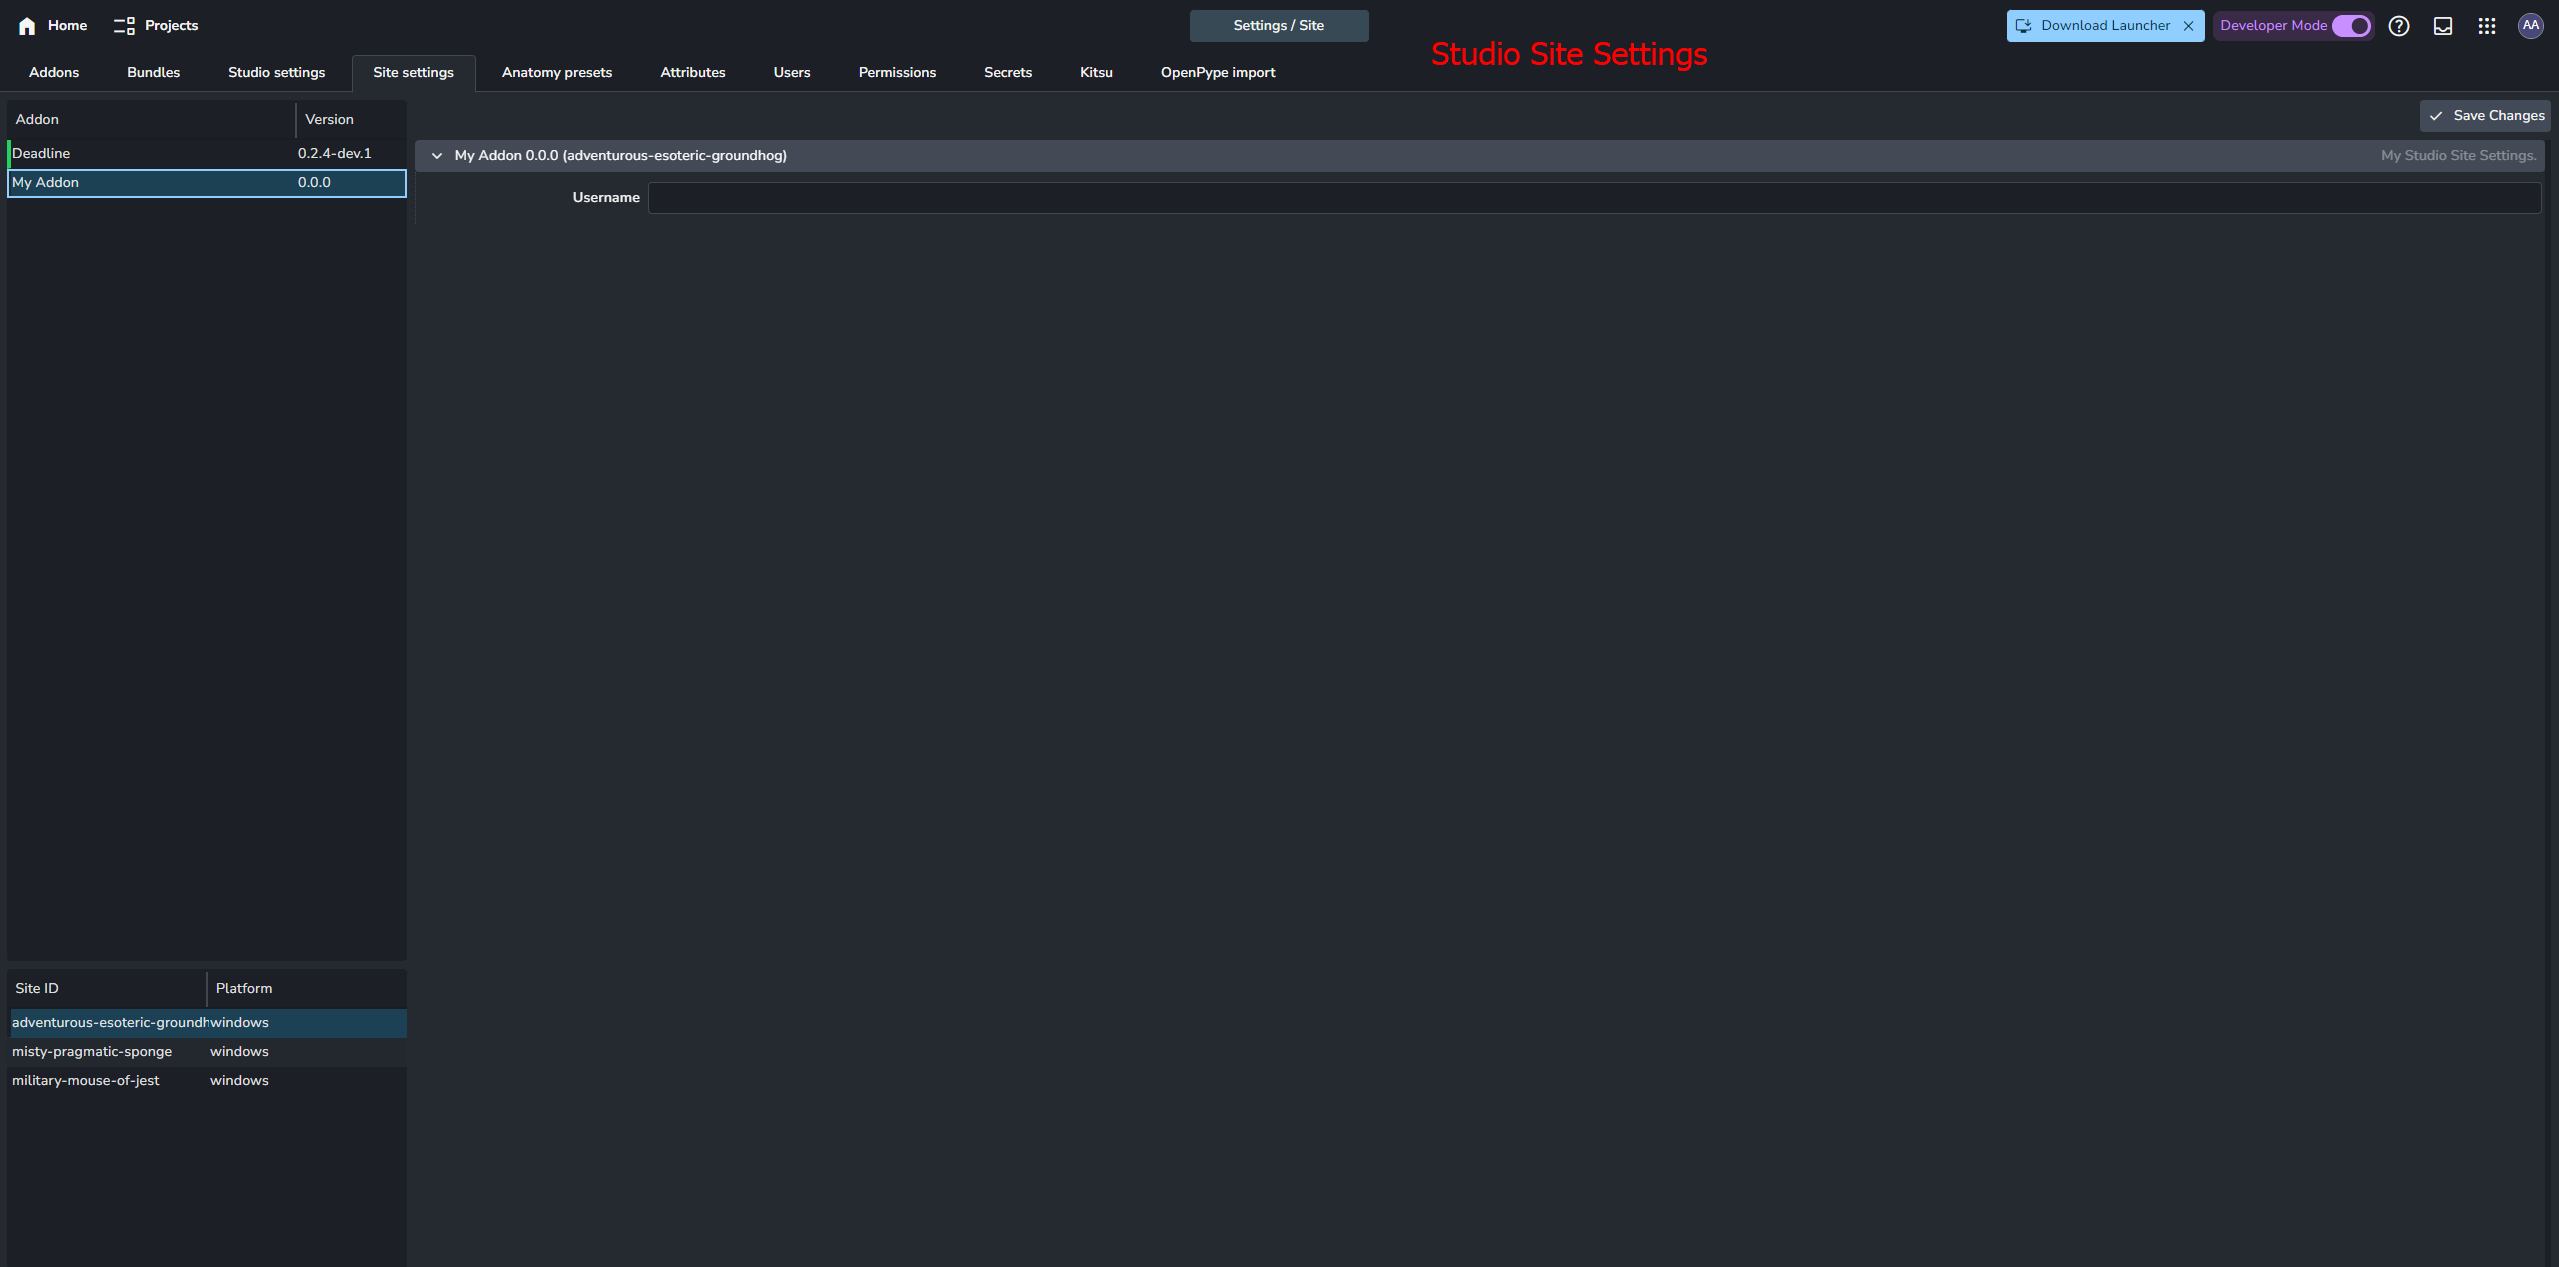
site: Addon local settings on project level. - Studio site settings: Addon local settings on studio level.
- In general, they are local settings for each site id. i.e. for every connected machine as every machine gets a unique site id.
- They don't inherit (nor override) any other settings. i.e. project site settings are from studio site settings
- studio site settings won't show up until you add your addon to the production bundle.
Settings and Site settings Example
Settings are data schemas based on pydantic
- studio and project settings and Project site settings: Currently achieved by adding settings to
settings_modelattribute in the addon class and usingscopeargument. - studio site settings: Currently achieved by adding settings to
site_settings_modelattribute in the addon class.
Code snippet:
from typing import Type
from ayon_server.addons import BaseServerAddon
from ayon_server.settings import (
    BaseSettingsModel,
    SettingsField
)


# Settings
class MySettings(BaseSettingsModel):
    """My Settings. """
    enabled: bool = SettingsField(True, title="Enabled")
    studio_name: str = SettingsField("", title="Studio Name", scope=["studio", "project"])
    username: str = SettingsField("", title="Username", scope=["site"])


# Default settings values
DEFAULT_VALUES = {
  "enabled": False,
  "studio_name": "Nothing",
  "username": "This doesn't override the username in studio site settings."
}

# Site Settings
class MyStudioSiteSettings(BaseSettingsModel):
    """My Studio Site Settings. """
    username: str = SettingsField("", title="Username")


class MyAddonSettings(BaseServerAddon):
    # Set settings
    settings_model: Type[MySettings] = MySettings
    site_settings_model: Type[MyStudioSiteSettings] = MyStudioSiteSettings

    # Set default settings values
    async def get_default_settings(self):
        settings_model_cls = self.get_settings_model()
        return settings_model_cls(**DEFAULT_VALUES)
End points
End points allow you to extends AYON API.
<ayon-server-url>:5000/api/addons/{addon_name}/{addon_version}/{endpoint_name}
Add endpoint example
from typing import Type
from ayon_server.api.dependencies import CurrentUser
from ayon_server.addons import BaseServerAddon
from ayon_server.settings import BaseSettingsModel


# Settings
class MySettings(BaseSettingsModel):
    """My Settings. """
    pass


# Default settings values
DEFAULT_VALUES = {}


class MyAddonSettings(BaseServerAddon):
    # Set settings
    settings_model: Type[MySettings] = MySettings

    # Set default settings values
    async def get_default_settings(self):
        settings_model_cls = self.get_settings_model()
        return settings_model_cls(**DEFAULT_VALUES)


    def initialize(self):
        self.add_endpoint(
            "studio-data",
            self.get_studio_data,
            method="GET",
        )

    # Example REST endpoint
    async def get_studio_data(
        self,
        user: CurrentUser
    ):
        """Return some value and user name."""
        return {
            "secret-of-the-studio": "There is no secret",
            "Current User": f"{user.name}"
        }
If you are curious, here's what happens when you access the api without logging in.
Web Action
Web actions let users trigger AYON Addons CLI actions directly from the AYON server to perform actions on their machines. They run through shims, which are automatically set up when users install the AYON launcher version 1.1.0 or higher.
Web actions are added in two steps:
- Client-Side CLI Actions: Develop the addon CLI actions in the client-side code of the addon. More about them in the next section CLI Interface.
- Server-Side Web Actions: Implement web actions in the server-side code of the addon and link them to their corresponding addon CLI actions.
Simple Web Action Example
This simple example triggers a QT dialog on the user's machine, showing the folder path from which the action was triggered.
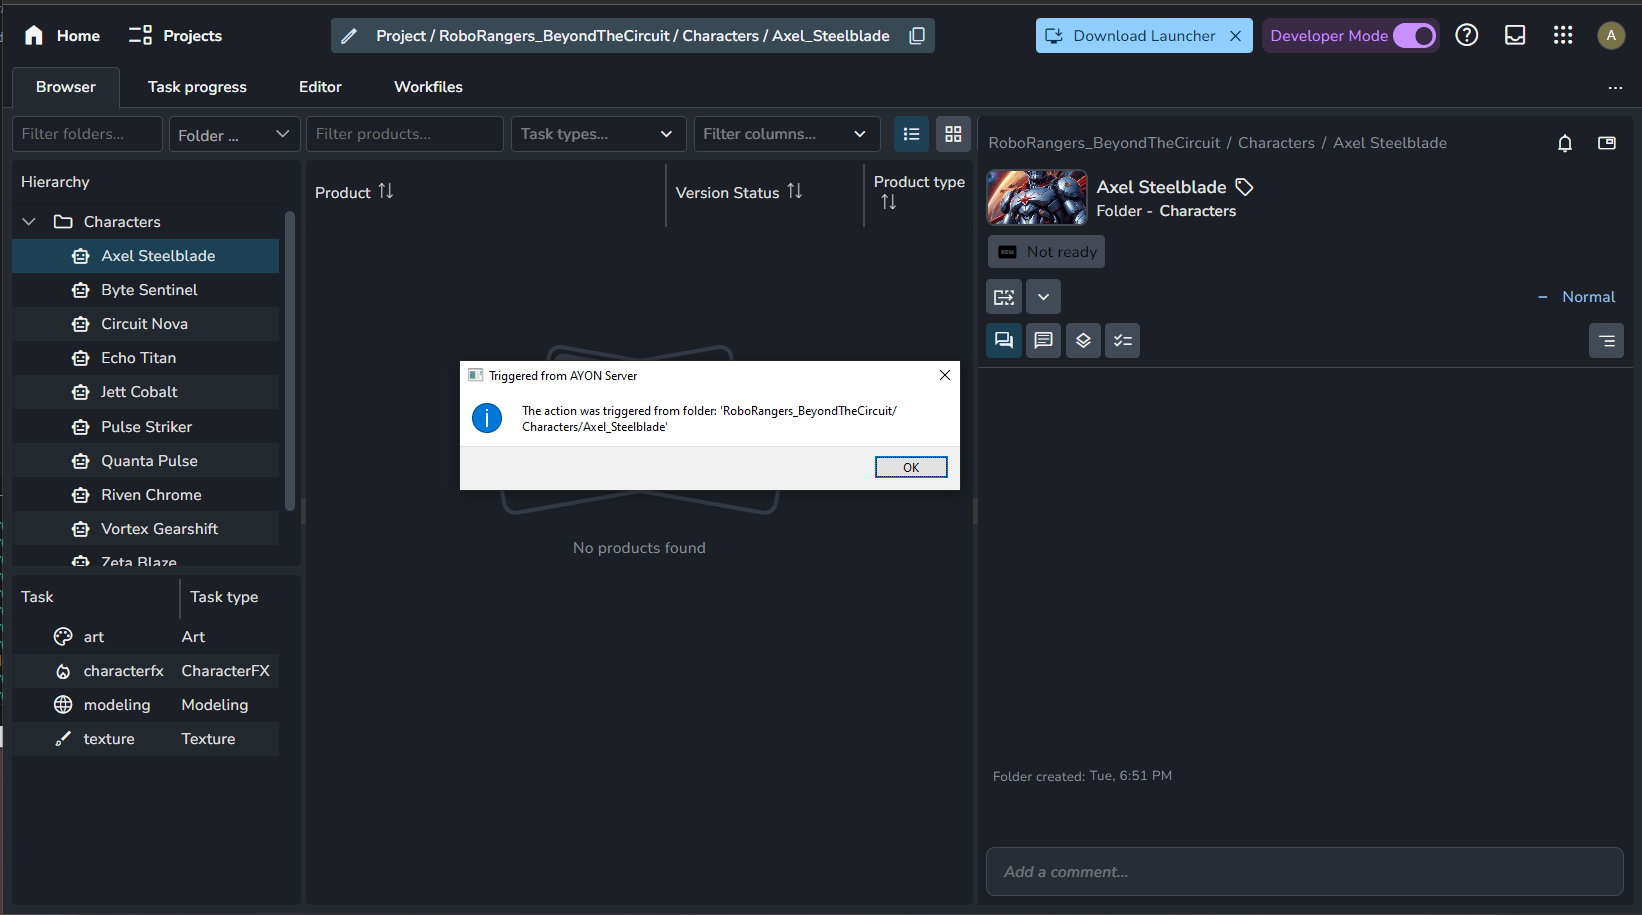
from qtpy import QtWidgets
import ayon_api

from ayon_core.addon import AYONAddon, click_wrap
from .version import __version__


class MyAddonCode(AYONAddon):
    """My addon class."""

    label = "My Addon"
    name = "my_addon"
    version = __version__

    # Add CLI
    def cli(self, click_group):
        # Convert `cli_main` command to click object and add it to parent group
        click_group.add_command(cli_main.to_click_obj())


@click_wrap.group(
    MyAddonCode.name,
    help="My Addon cli commands.")
def cli_main():
    pass

@cli_main.command()  # Add child command
@click_wrap.option(
    "--project",
    help="project name",
    type=str,
    required=False
)
@click_wrap.option(
    "--entity-id",
    help="entity id",
    type=str,
    required=False
)
def show_selected_path(project, entity_id):
    """Display a dialog showing the folder path from which the action was triggered."""

    # Process the input arguments
    con = ayon_api.get_server_api_connection()
    entity = con.get_folder_by_id(project, entity_id)

    folder_path = f"{project}{entity['path']}"

    # Show Dialog
    app = QtWidgets.QApplication()
    QtWidgets.QMessageBox.information(
        None,
        "Triggered from AYON Server",
        f"The action was triggered from folder: '{folder_path}'",
    )
from ayon_server.actions import (
    ActionExecutor,
    ExecuteResponseModel,
    SimpleActionManifest,
)

from ayon_server.addons import BaseServerAddon


IDENTIFIER_PREFIX = "myaddon.launch"


class MyAddonSettings(BaseServerAddon):
    # Set settings
    async def get_simple_actions(
        self,
        project_name: str | None = None,
        variant: str = "production",
    ) -> list[SimpleActionManifest]:
        """Return a list of simple actions provided by the addon"""
        output = []

        # Add a web actions to folders.
        label = "Trigger Simple Action"
        icon = {
            "type": "material-symbols",
            "name": "switch_access_2",
        }
        output.append(
            SimpleActionManifest(
                identifier=f"{IDENTIFIER_PREFIX}.show_dialog",
                label=label,
                icon=icon,
                order=100,
                entity_type="folder",
                entity_subtypes=None,
                allow_multiselection=False,
            )
        )

        return output

    async def execute_action(
        self,
        executor: "ActionExecutor",
    ) -> "ExecuteResponseModel":
        """Execute an action provided by the addon.

        Note:
            Executes CLI actions defined in the addon's client code or other addons.

        """

        project_name = executor.context.project_name
        entity_id = executor.context.entity_ids[0]

        if executor.identifier == f"{IDENTIFIER_PREFIX}.show_dialog":
            return await executor.get_launcher_action_response(
                args=[
                    "addon", "my_addon", "show-selected-path",
                    "--project", project_name,
                    "--entity-id", entity_id,
                ]
            )

        raise ValueError(f"Unknown action: {executor.identifier}")
Icons support material-symbols as well as addon static icons, more info check Private and Public Dirs.
icon = {
  "type": "url",
  "url": "{addon_url}/public/icons/" + icon_name
}
For SimpleActionManifest, you can use different entity types.
"folder": Any folder path that is not a task."task": Tasks. :::
Addon Client Code
Also, we can refer to this section as Unlock Pipeline Powers since client code is used to direct the pipeline!
It's called client code, because the code is distributed to clients (i.e. machines that have AYON launcher installed and logged into AYON)
The far first step:
- you should update
package.pyto specify the{client-code-dir}For the following examples, I added the following line to mypackage.py
client_dir = "my_addon"
You can use your addon in AYON dev mode by specifying client directory.
Add some client code
I've created a file in my_addon/client/my_addon/
# some_code.py
def hello_ayon():
    print("Hello AYON!")
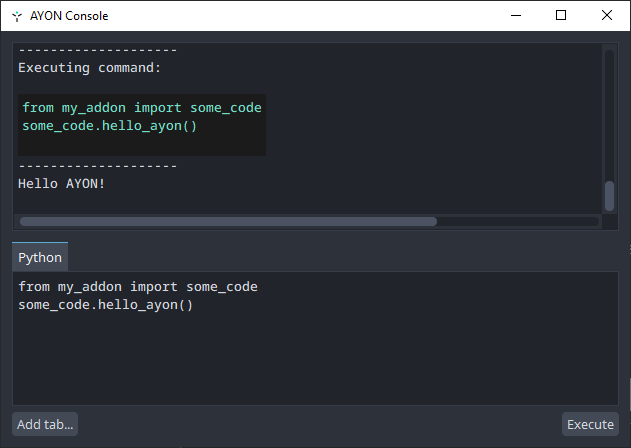
At this point, AYON will complain, check ayon launcher log, that addon has no content as the client code doesn't implement ayon_core.addon.AYONAddon class.
*** WRN: >>> { AddonsLoader }: [ Addon my_addon 0.0.0 has no content to import ]
Minimalist addon client definition
from ayon_core.addon import AYONAddon
# `version.py` should be created by `create_package.py` by default.
# if it's not created, please, create an empty file
# next to __init__.py named `version.py`
# and `create_package.py` will update its content.
from .version import __version__


class MyAddonCode(AYONAddon):
    """My addon class."""

    label = "My Addon"
    name = "my_addon"
    version = __version__

    def initialize(self, settings):
        """Initialization of addon attributes.

        It is not recommended to override __init__ that's why specific method
        was implemented.
        Note:
            This method is optional.

        Args:
            settings (dict[str, Any]): Settings.
            These settings that were defined in `MyAddonSettings.settings_model` in the server dir.
        """
        pass
AYON client Interfaces:
In the previous example, we have implemented ayon_core.addon.AYONAddon which is the base abstract class for any ayon addons.
It lives in ayon_core.addon among other helpful interfaces that adds extra features to your addon.
Interfaces:
IPluginPathsITrayAddonITrayActionITrayServiceIHostAddon
CLI Interface
It's done by implementing AYONAddon.cli which utilizes ayon_core.addon.click_wrap
For more info please refer to the doc string of ayon_core.addon.click_wrap
Minimalist addon client definition
from ayon_core.addon import AYONAddon, click_wrap
# `version.py` should be created by `create_package.py` by default.
from .version import __version__


class MyAddonCode(AYONAddon):
    """My addon class."""

    label = "My Addon"
    name = "my_addon"
    version = __version__

    # Add CLI
    def cli(self, click_group):
        # Convert `cli_main` command to click object and add it to parent group
        click_group.add_command(cli_main.to_click_obj())


@click_wrap.group(
    MyAddonCode.name,
    help="My Addon cli commands.")
def cli_main():
    print("<<<< My Addon CLI >>>>")


@cli_main.command()  # Add child command
def some_command():
    print("Welcome to My Addon command line interface!")


@cli_main.command()  # Add child command
@click_wrap.option(
    "--arg1",
    help="Example argument 1",
    type=str,
    required=False
)
def command_with_arg(arg1):
    print(f"Received {arg1}.")
Then in terminal, you'll able to use it. (some examples in ayon dev mode) Windows:
ayon-launcher/tools/ayon_console.bat --use-dev addon my_addon some_command
ayon-launcher/tools/ayon_console.bat --use-dev addon my_addon command-with-arg --arg1 some_argument
Linux & MacOs:
ayon-launcher/tools/make.sh --use-dev addon my_addon some_command
ayon-launcher/tools/make.sh --use-dev addon my_addon command-with-arg --arg1 some_argument
Tray
It's used to add your widgets to ayon launcher's tray menu. There are several interfaces for extending AYON Tray.
ITrayAddonITrayService: inheritsITrayAddonand implementstray_menuITrayAction: inheritsITrayAddonand implementstray_menu
For more info, please refer to ayon_core.addon
The following example is done by implementing ITrayAddon interface.
Custom tray widget example
from qtpy import QtWidgets
from ayon_core.addon import AYONAddon, ITrayAddon
# `version.py` should be created by `create_package.py` by default.
from .version import __version__


class MyAddonCode(AYONAddon, ITrayAddon):
    """My addon class."""

    label = "My Addon"
    name = "my_addon"
    version = __version__

    # ITrayAddon
    def tray_init(self):
        """Tray init."""
        pass

    def tray_start(self):
        """Tray start."""
        pass

    def tray_exit(self):
        """Tray exit."""
        return

    def show_my_dialog(self):
        """Show dialog to My Dialog."""
        QtWidgets.QMessageBox.information(
            None,
            "My Dialog",
            "Hello AYON!",
        )

    # Definition of Tray menu
    def tray_menu(self, tray_menu):
        # Menu for Tray App
        menu = QtWidgets.QMenu(self.label, tray_menu)
        menu.setProperty("submenu", "on")

        # Actions
        action_show_my_dialog = QtWidgets.QAction("My Dialog", menu)
        menu.addAction(action_show_my_dialog)
        action_show_my_dialog.triggered.connect(self.show_my_dialog)

        tray_menu.addMenu(menu)
Result:
Plugins
It's done by implementing IPluginPaths interface.
The following keywords are used to specify the extra plugins location
actions: AYON launcher actions (They appear next to apps in the launcher.)- pyblish
create: Creator pluginsload: Loader pluginspublish: Publish plugins e.g. collector, validator, extractorsinventory: inventory (manage loaded assets) plugins
There are several examples already. e.g.
- Launcher Action:
Debug Shellaction in Applications addon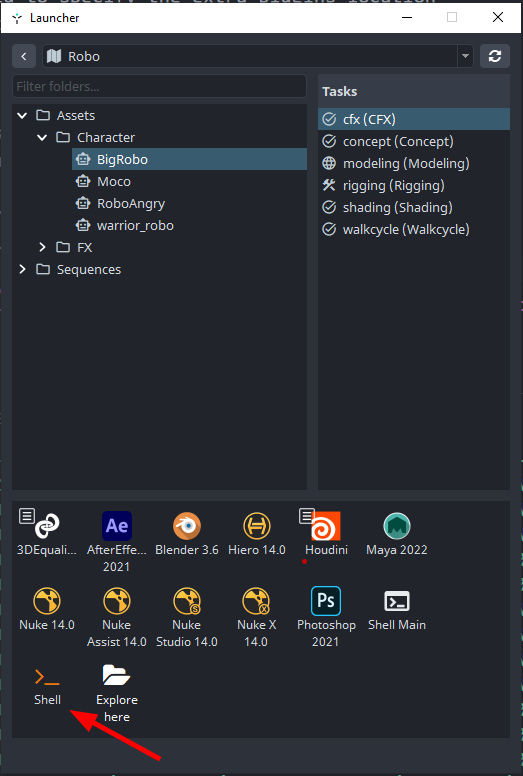
- Extra Pyblish plugins: Deadline addon provides extra publish plugins paths for different Hosts.
Host Implementation
It's done by implementing IHostAddon interface.
DCC Host implementation can vary in a very distinctive way due to the fact that each app has it own api.
Currently, These methods are used to integrate different DCC hosts
- python api: Some DCCs support python and provide a python api. This is the easiest way to install AYON inside the DCC. e.g. Maya, Houdini, Nuke, Unreal, ...
- socket communication: Some DCCs support different languages, it can't load python scripts but they at least support socket communication. e.g. Adobe products, e.g. AfterEffects.
- cli interface: Most DCCs provide cli interface that allows you to perform actions inside the DCCs by running some commands in a terminal window.
- text editing programmatically: Some DCCs save their files in some common format e.g. JSON format, XML format. We can fake performing some actions in the DCC by editing the file before launch. and that's how Wrap addon update the placeholders inside the workfiles. Here's a code snippet
Oversimplified, we have 3 categories of Host implementations:
- We use main DCC process for our UIs (Maya, Nuke, Houdini, ...).
- We use socket based communication with DCC to show UIs in our process (PS, AE, Harmony, TVPaint, ...).
- We don't directly integrate the DCC, but we're able to achieve some degree of integration (Wrap, Celaction, ...).
For more info about how to implement a host integration please fgo to Host implementation
Private and Public Dirs
private and public, as description in the Readme says, They contains static content available for download.
static content: It's any file you can imagine, zip file with client code, image files (e.g. png icon) etc.
privatecan be accessed only if you're logged into the server.publiccan be access without being logged into the server.
Utilizing the private folder is a key strategy we employ to seamlessly distribute addon client code to user machines.
Feel free to explore the contents of any addon zip file to witness our approach in action! 😉
Public is meant for data that should be accessed publicly by external services. e.g. AYON ftrack icons.
Please, Don't put any sensitive data in public directory.
Anyone can download that data if they can visit/reach your AYON_SERVER_URL without the need to login.
How to add static content
You only need to put your content in the folder named private or public based on your needs.
How to access static content
Currently, We can access the static content via ayon's api, either from the browser directly or using tools like postman or programmatically using python for example.
As a developer, you have the ability to create a frontend for your addon that utilizes Ayon's API. This will enable users to download static content, whether it's private or public.
To access
publiccontent: since you don't need an auth token, you can use any web browser like if you are visiting any website.http://<AYON_SERVER_URL>/addons/<addon-name>/<addon-version>/public/<path-inside-public-folder>Here's an example from
ftrackaddon.http://<AYON_SERVER_URL>/addons/ftrack/1.1.2/public/icons/BatchTasks.svg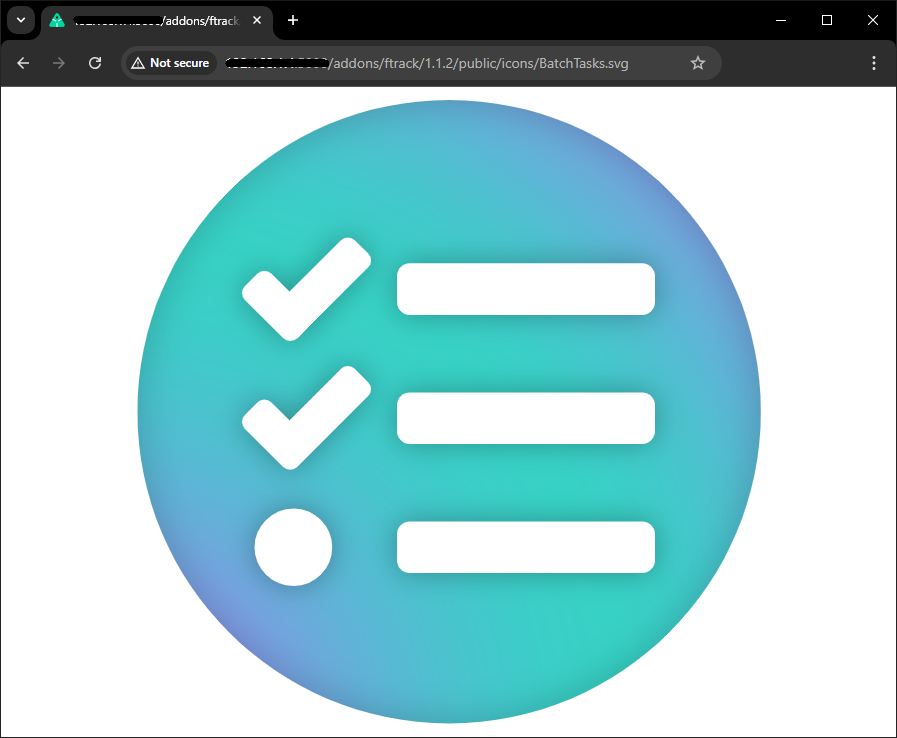
To access
privatecontent.If you are logged into you ayon server, you can use the same web browser you've used to log into AYON Server. as the your browser stores the auth token.
http://<AYON_SERVER_URL>/addons/houdini/0.3.1/private/client.zipWhen using clients like postman, you'd need to provide an
auth token.you can also use
ayon-python-api.Download
privatecontentvia ayon-python-apiimport os
import ayon_api
os.environ["AYON_SERVER_URL"] = "ayon-url"
os.environ["AYON_API_KEY"] = "service-user-key"
ayon_api.init_service()
# Since client code is a private content, I can download it
# using ayon_api.download_addon_private_file
ayon_api.download_addon_private_file(
addon_name="houdini",
addon_version="0.3.1",
filename="client.zip",
destination_dir="E:/Ynput/temp"
)
Addon Frontend
The only configuration needed to add a frontend is by adding frontend_scopes attribute in your addon server.
from typing import Any

from ayon_server.addons import BaseServerAddon


class MyAddonSettings(BaseServerAddon):
    # Set settings
    frontend_scopes: dict[str, Any] = {"settings": {}}
React App
This is the straight forward way for implementing frontend. To get started you'd need to install node js on your machine.
Ready to Run Example
example-studio-addon/frontend is a ready to run example. It was developed during Ynput Hackathon 2024 workshops.

Start from Scratch
Let's start from scratch step by step:
In frontend directory:
- Create vite projectThen,
npm create vite@latest- Set
Project name(we usually use the addon name) - Select
Reactframework. - Select
Javascript(This example uses JS. Feel free to pick your favorite variant)
- Set
- Install the necessary components
npm i @ynput/ayon-react-addon-provider
npm i @ynput/ayon-react-components
npm i styled-components
npm i axios - Implement necessary
useEffectsin./src/main.jsxand add AYON's addon provider toReactDOM.createRoot. You may also need to save youraddonDatain acommon.jsfile. Take reference from example-studio-addon/frontend/src/index.jsx - Update your vite config to work with AYON. it allows adding your env file and test your frontend without creating and uploading your addon to AYON Server. Take reference from example-studio-addon/frontend/vite.config.js
And, this is how we built the frontend in example-studio-addon.
Raw HTML
AYON Server just uses iframe for embedding Addon's frontend, and it expects /dist/index.html file so you can use any HTML there.
You just need to register window.onmessage event to receive the context (such as authorization key, project name for project scoped addons and so on) For reference from production: Shotgrid addon actually uses plain HTML, ayon-shotgrid/frontend/dist
Alternative Options
It was reported many times that it would be much better to be able to Build UI with python.
Since, AYON servers expects {my-addon}/frontend/dist/index.html and it doesn't expect a webserver to run.
Then, what about running the webserver on our own (maybe as an ayon service) and embedding it in the /dist/index.html page ?
This is what I've tested with a flask app (5 mins experiment)
Flask Experiment
What I've tried so far is using python flask app and embedding it in my addon's frontend. I believe this can work with any webserver app python, node js, ...
Don't forgot to update the addon server part as mentioned earlier. You may also need to comment out
build_frontendcall increate_package.py
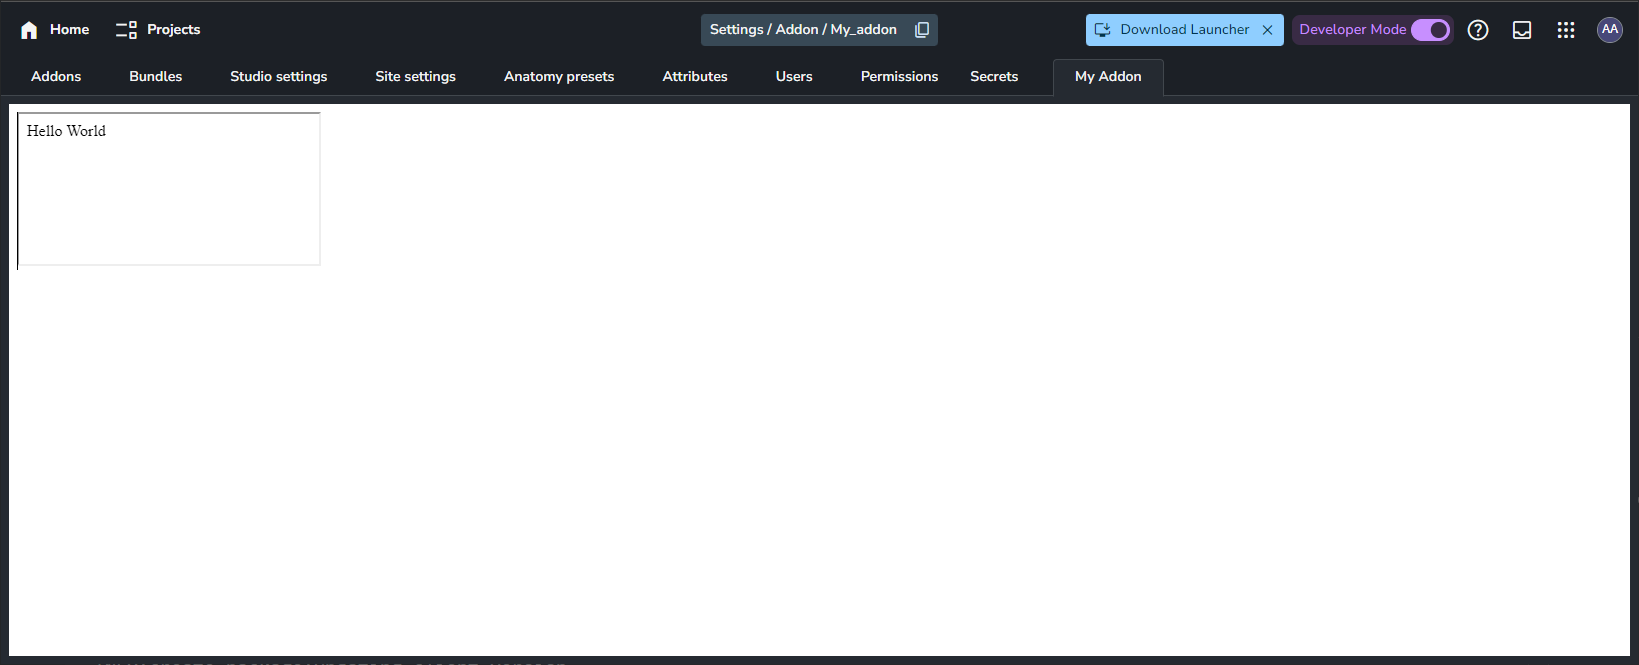
Here's my {my-addon}/frontend/dist/index.html page
This the only file in the dist directory.
<!doctype html>
<html lang="en">
  <head>
    <meta charset="UTF-8" />
    <meta name="viewport" content="width=device-width, initial-scale=1.0" />
    <title>AyonAddon</title>
  </head>
  <body>
    <div id="root">
      <iframe src="{my-webserver-address:port}/" title="flask app"></iframe>
    </div>
  </body>
</html>
Addon Services
Service is a script/application that uses some API and is able to connect different systems. e.g. Connect AYON to ftrack.
Typically, these scripts are dockerized and spawn on AYON Service Host (ASH), similar to portainer.
Creating Services workflow:
- Development (run and build)
- Distribution
- Push to a docker registry (Dev machine: Build & Push, ASH machine: Pull & Run)
- online (e.g. DockerHub or Github)
- inhouse (local docker registry)
- Manual installation. (Build on ASH Machine, ASH machine: Run)
- Push to a docker registry (Dev machine: Build & Push, ASH machine: Pull & Run)
It won't pull the image if there's already a matching tag on the ASH machine.
Add examples for Creating Services workflow
